Garden Girl Cooks

Grow Cook Eat

  • Home
  • Recipes
  • Gardening
    • Plants
      • Fruit and Vegetable Plants
    • Bugs
  • Chickens
  • About Me
  • Contact

Hibiscus Jam

Hibiscus Jam
Jump to Recipe

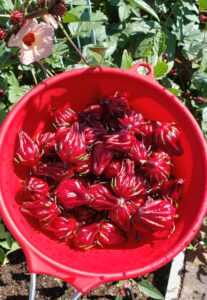
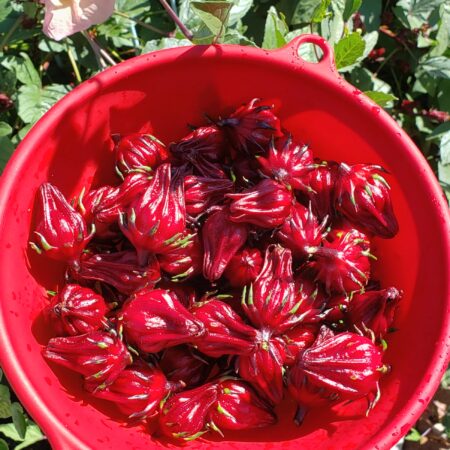
If you’re lucky enough to have access to the fresh calyxes of roselle hibiscus (Hibiscus Sabdriffa) then you must make jam! Roselle hibiscus grows great in the Phoenix, Arizona area, click here to learn about growing it.

All you need are fresh Roselle Hibiscus calyxes, sugar and water. You’ll make natural pectin with the seed pods found inside the calyxes.

Roselle Hibiscus Calyxes

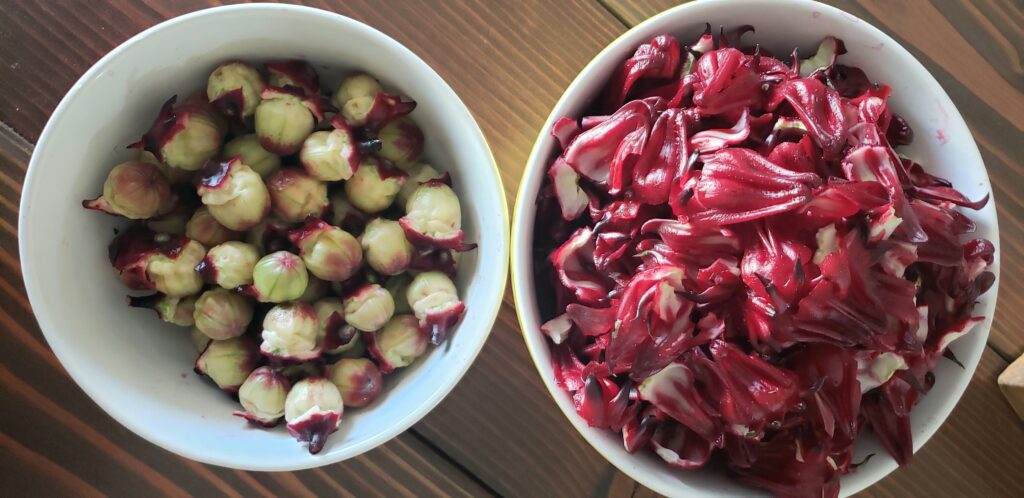
Separate the calyxes into two parts.
Seed pods on left and red petals on right

After you separate and wash the 2 parts, cut the seed pods in half and add to a pot and fill with water to just cover the seed pods. Bring to boil and simmer until the water has become thickened, about 20 mins.

Seed pods simmering in water

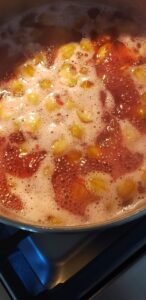
After it’s thickened, strain the liquid into a measuring cup. You’ll want to add the same amount of simple syrup to the red petals and pod liquid and then bring to boil and simmer until the petals become soft and the mixture thickens. Taste test for sweetness and add more simple syrup if you’d like it sweeter. Then use an immersion blender or regular blender and blend to the smoothness of your liking. You can refrigerate or water bath can it following canning instructions for jams and jellies according to your altitude.

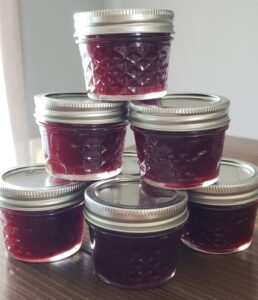
Enjoy your jam on toast, cheesecake or with a turkey sandwich!

Hibiscus Jam

gardengirlcooks
Similar to the flavor of cranberry with a hint of raspberry, this jam is delicious on toast and cheesecake
Print Recipe Pin Recipe
Course Dessert
Servings 6 servings

Ingredients
  

  • 6 cups Fresh Hibiscus sabdriffa calyxes
  • 2 cups sugar, estimated depending on your taste
  • 4 cups water, approximate for boiling seed pods and making simple syrup

Instructions
 

  • Separate red petals of calyx from the seed pod, wash petals and pods, then cut pods in half
  • Put pods in large pot and fill with water so it is just covering the top of the pods
  • Bring to boil and then simmer until the water is thick and coats the back of a spoon, about 20 mins
  • Strain the liquid into a measuring cup and discard the pods
  • Make a simple syrup with equal parts water and sugar to make the same amount of liquid as you got from the seed pod liquid
  • Add the washed red petals to the simple syrup and the liquid from the pods to the pot. Bring to boil and simmer for about 20-30 mins.
  • Taste test for sweetness and add more simple syrup to your liking
  • Once the mixture has simmered down and thickened up, blend it with an immersion blender or in a regular blender
  • Add to jars and refrigerate or you can preserve them by canning them in a water bath and following canning instructions for jams and jellies for your altitude

Check out these other recipes-

Hibiscus simple syrup– https://www.gastronomblog.com/hibiscus-simple-syrup/

Hibiscus Lemon Bars– https://theviewfromgreatisland.com/hibiscus-lemon-bars-recipe/

Candied Hibiscus–https://themanifestnest.com/2016/11/15/candied-roselle-hibiscus/

Hibiscus Liqueur–https://makeityourown.com/recipes/hibiscus-liqueur/

Caramelized Fig Ice Cream with mascarpone and candied pecans

August 1, 2014 by gardengirlcooks

with mascarpone and candied pecans My obsession with figs is a relatively new thing.  I probably had never eaten a fresh fig until my friend gave me some from the tree that was growing at a house she was renting.  I sliced them, put them on my greek yogurt and drizzled them with honey.  I was hooked.  It was then that I decided, that I too must have a fig tree.

Here’s my little fig tree

0627140857

After taking the Arcadia Edible Garden Tour last year and seeing an  espaliered fig tree, I knew I must build an espalier for my fig tree.  This would help keep the fig tree manageable and make reaching the figs relatively easy.

This is how it will look someday!  (Hopefully)

934 Picture courtesy Landscape Resource

Anyway, on to the Caramelized Fig Ice Cream with mascarpone and candied pecans.  Another friend of mine has a giant fig tree at her condo (I know, I pick good friends, right?).  She had tons, literally tons of figs, so she gave me half a ton.  Okay, maybe I exaggerate a little.  She gave me a large quantity of figs so I decided to make fig ice cream.  I searched the internet and found this recipe from Happyolks.  I used a different ice cream recipe and candied pecans instead of the honey roasted pecans and it was delicious.  My niece agreed.  I think she was a little disappointed the next time she came over and I told her that I had eaten it all.

First I made the caramelized fig mixture.  I could have just eaten it with a spoon, but decided I should save most of it for the ice cream.  After I cooked the mixture, I let it cool and refrigerated it overnight.

caramelizedfigmixture

Then I started the ice cream base.  In a sauce pan I combined milk, cream and 1/2 cup of sugar.  I cooked it until the sugar was dissolved.  While the milk, cream and sugar mixture was heating up, in a separate bowl, I beat the eggs and 1/4 cup of sugar until they become thick and pale yellow.  It looked like this-

beateneggs

Next I took a 1/2 cup of the warm milk mixture and beat it into the egg mixture.  Then I slowly added the egg mixture into the pan with the milk mixture.  I cooked it over low heat until it thickened and the mixture coated the back of a spoon.  About 7-10 mins.  I poured the mixture through a mesh strainer and then stirred in vanilla extract and cooled it overnight in the refrigerator.

DSC00993

The next day, I froze the ice cream.  This is the most exciting part, because I got to finally taste the ice cream.  Ice cream is not a good thing to make if you need instant gratification.  It is a long project.  When the ice cream was almost frozen, I poured in the fig mixture, nuts and mascarpone.  I dropped little spoonfuls of mascarpone so it wouldn’t be one giant lump.  I froze the ice cream for a few hours.  It was worth the wait.  I need to make more soon.  Hopefully I can use my own figs this time!

with mascarpone and candied pecans

Caramelized Fig Ice Cream with mascarpone and candied pecans

Print Recipe Pin Recipe

Ingredients
  

Caramelized Fig Mixture

  • 1 lb of fresh figs sliced in half
  • 1 lemon juiced
  • 1/2 cup brown sugar
  • 2 tablespoons butter
  • 2-4 tablespoons water
  • 1/2 teaspoon salt

Ice Cream

  • 1 cup whole milk
  • 2 cups heavy cream
  • 3/4 cup sugar
  • 5 large egg yolks
  • 1 teaspoon vanilla extract

Mix ins

  • 1 cup candied pecans
  • 1/2 cup mascarpone

Instructions
 

For carmelized fig mixture-

  • Melt butter in sauce pan over medium heat.
  • Dissolve brown sugar into melted butter.
  • Mix in figs, lemon juice and water.
  • Cook over medium heat breaking up the figs until it's a thick jammy consistency.
  • Stir in salt.
  • Let cool and refrigerate until ready to mix into ice cream.

For ice cream

  • In a sauce pan combine the milk, cream and 1/2 cup of sugar. Cook until sugar dissolves.
  • In a separate bowl beat the eggs and 1/4 cup of sugar until they become thick and pale yellow.
  • Next take 1/2 cup of the warm milk mixture and beat it into the egg mixture.
  • Slowly add the egg mixture into the pan with the milk mixture.
  • Continue cooking over low heat until thick and the mixture coats the back of a spoon. About 7-10 mins.
  • Pour mixture through mesh strainer, stir in vanilla extract and cool overnight in the refrigerator.

Freeze ice cream

  • Follow your manufacturer's instructions for freezing your ice cream.
  • Once ice cream is almost frozen, mix in caramelized fig mixture, nuts and spoonfuls of mascarpone.
  • Freeze at least a few hours before serving.

Filed Under: Dessert

Strawberry Shortcake Cupcakes

July 28, 2014 by gardengirlcooks

strawberryshortcakecupcakes I was craving strawberry shortcake.  I usually need an excuse to make dessert, otherwise I will end up eating the whole thing.  So I decided to make these cupcakes for a little get together I was having.  My friends that moved away to Colorado, were going to be in town for a wedding, so we planned a little reunion party with all our old co-workers.  It was really fun and great to see everyone.

Strawberry shortcake is probably not the best dessert to serve to a big crowd.  Who wants to assemble a large quantity of strawberry shortcakes?  Not me!  I thought strawberry shortcake cupcakes would be perfect, so I started my search for the perfect cupcake and frosting recipe.  I came across this recipe from Damn Delicious and thought it sounded really good.  I doubled the recipe and it made about 24 cupcakes in a regular size cupcake pan.  I couldn’t find freeze dried strawberries for the frosting so I decided to see what other strawberry buttercream recipes I could find.  I found this recipe from Add a Pinch.  Instead of the strawberry syrup I used strawberry jam.  I used a natural strawberry jam with no added coloring and the frosting came out a little off white, so I had to add some red food coloring.  I really don’t like to use food coloring, but I didn’t want to have ugly cupcakes.  I should make my own red food coloring out of beets 🙂  I will put that on my do to list!

These cupcakes were a huge hit!  The cupcakes were the perfect combination of cake and biscuit.  It really seemed like I was eating strawberry shortcake!  In my opinion, buttercream frosting is the best frosting for cupcakes.  This strawberry buttercream was creamy with the just a hint of strawberry to compliment the strawberries mixed into the cake. You should make these Strawberry shortcake cupcakes immediately!  They have fruit in them.  That makes them healthy, right?

Strawberry shortcake cupcakes

Strawberry Shortcake Cupcake

Print Recipe Pin Recipe
Servings 24 cupcakes

Ingredients
  

Cupcake

  • 2 1/4 cups all-purpose flour
  • 1/4 cup corstarch
  • 2 1/2 teaspoons baking powder
  • 1/4 teaspoon salt
  • 1 cup sugar
  • 4 large eggs
  • 2 1/2 teaspoons vanilla extract
  • 1/2 cup vegetable oil
  • 1/2 cup butter melted
  • 1 cup whole milk
  • 1 cup diced strawberries
  • 24 strawberry slices for garnish

Strawberry Buttercream Frosting

  • 1 cup unsalted butter room temperature
  • 3 1/2-4 cups powdered sugar sifted
  • 4 tablespoons strawberry jam
  • 1 tablespoon vanilla extract
  • 2 tablespoons half-n-half heavy cream or whole milk
  • pinch of salt
  • 3-4 drops of red food coloring

Instructions
 

Cupcake

  • Preheat oven to 350 degrees F.
  • Combine flour, cornstartch, baking powder and salt.
  • Beat sugar, eggs and vanilla on medium speed until light and fluffy, about 2 to 3 minutes. Add in vegetable oil and butter, beat until combined well.
  • Alternate adding in dry mixture and milk. Start with a 1/3 of the dry mixture, then add 1/2 of the milk, continue until all ingredients are incorporated. You should start and end with the dry mixture. Do not over mix.
  • Fold in diced strawberries.
  • Fill 24 regular cupcakes liners that have been inserted into regular sized cupcake baking tin. Fill to a little more than 3/4 full. These cupcakes don't rise a lot. Bake for 15-18 minutes until a toothpick comes out clean. Remove from oven and cool completely on a cooling rack.

Strawberry Buttercream Frosting

  • Cream together butter and powdered sugar, adding powdered sugar 1/2 cup at a time.
  • Add the strawberry jam and beat until mixed in.
  • Add half-n-half, cream or milk one tablespoon at a time until the frosting holds it's shape.
  • Add a pinch of salt and the red food coloring.
  • Beat slowly at first then increase speed for a final 20 seconds or until the red food coloring is mixed in and the color is consistent throughout.
  • Refrigerate for about 30 mins until the frosting firms up. Pipe onto the cupcakes and add the strawberry slices to decorate.

Filed Under: Dessert Tagged With: cupcakes, strawberry buttercream, strawberry cupcake, strawberry short cake, strawberry shortcake, strawberry shortcake cupcakes

Welcome

Hi! I'm Kristin. I love to cook, garden, entertain and create. I like to keep my cooking fresh and healthy, but life's too short to not eat dessert. :) I fantasize about living on a Read More...

Etsy

amazon ad

Recipes

About Me

Sun Valley Baskets & Gifts
https://sunvalleygiftbaskets.com/

Copyright © 2025 · Foodie Child Theme by Shay Bocks · Built on the Genesis Framework · Powered by WordPress